
Last month, Keycon 2014 happened. For those of you not in the know, Keycon is an annual keyboard enthusiast convention organized by the awesome members of Geekhack. At Keyboardio we were unfortunately already booked – but since the good folks at 724support put the whole thing on YouTube, we got to relive the action.
Here’s what went down.
- Project Ravello – a keyboard business card!
- Keyboard switch types
- Hall effect switches in detail
- “MC HKC” programmable keyboard controller
- Designing keyboard layouts
- Metals processing for keyboards
- Keyboards on display
Day 1 presentations
The first presentation of Keycon was made over Skype, after half an hour of troubleshooting the connection building hype.
Project Ravello (Watch)
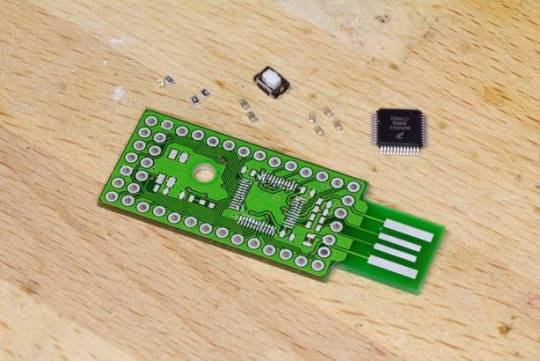
i3oilermaker unveiled the updated TechKeys keyboard business card, which now features a 7x24 LED array, which can be used to display (programmable) key states, or even play Tetris!
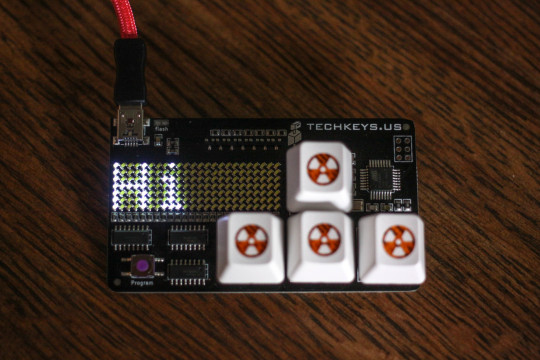
Improving on last year’s model, the card now includes mounting holes for 4 Cherry MX compatible keyswitches. It will be sold as a PCB kit (switches not included) for $30 and should be available in 2 weeks. i3oilermaker offered assurances that there will be Easter Eggs in the firmware!
A special “Geekhack” edition was auctioned off after the presentation for $46.
Keyboard switch types (Watch)
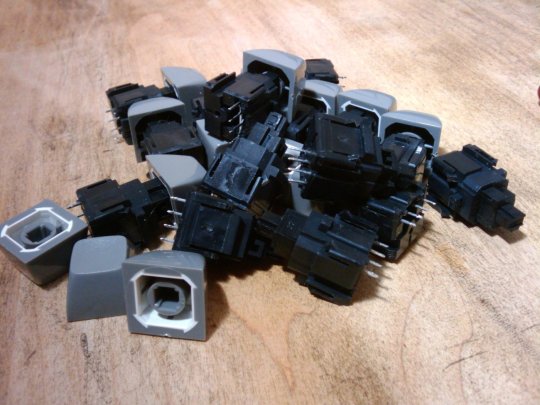
Next, Jacob (HaaTa) shared his comprehensive knowledge of keyswitches, detailing the pros and cons of electrical contact switches, capacitive switches, and several types of “exotic” switches.
Electrical contact
Electrical contact switches – exemplified by Cherry and Alps – are the most common type of mechanical keyboard switch. A keypress physically completes an electrical circuit by connecting two metal contacts. N-key rollover is possible with diodes or a 1xN matrix.
Unfortunately, the physical properties of the metal parts make the signal ‘bounce’ when the switch is engaged or released. The process of eliminating these false signals is typically done in firmware, aptly called ‘debouncing’ code. In terms of reliability, metal corrosion causes problems as the switches age.
Capacitive
Capacitive sensors are found in touchscreens of smartphones, but they also make for a great keyswitch. Topre is the best known (only?) manufacturer of capacitive keyboard switches. Positive and negatively charged plates are separated by a small gap, forming a parallel plate capactitor. The presence of a dielectric material (such as your finger) changes the capacitance and actuates the “switch”.
Capacitive switches are corrosion resistant and support N-key rollover without diodes. Analog sensing is possible, but a good implementation has not been demonstrated. The downside is that analog to digital converters are required which increase cost, and the sensing circuit is more susceptible to environmental concerns. Debouncing is still required with capacitive keyswitches.
Magnetic
In general, magnetic switches will not work underwater. But then again, neither will your computer.
Hall effect switches are fully analog, impervious to the environment (save for magnetic fields of course), and naturally debounced if Schmitt triggered. They are quite rare due to their high cost: a magnet, IC and 3 connections are required for each switch. More information on Hall effect switches is given in a later presentation – read on!
Magnetic reed switches are common in vintage calculators, and in door/window alarms. Two metal ‘reeds’ are typically held apart by magnetic force within a gas-filled glass enclosure. A change in magnetic force snaps the circuit closed, triggering a keypress. Because their enclosure is hermetically sealed, reed switches resist corrosion and are more or less impervious to the environment. They require debouncing, but are relatively cheap.
Magnetic valve switches are rather complicated, so a helpful analogy is a kitchen faucet. I didn’t understand this part of the presentation well enough to paraphrase how they work, but you’re welcome to watch it yourself!. They resist corrosion, are impervious to the environment, are cheap and may not actually require a magnetic field. Like most switches though, they require debouncing.
Optical
Photoresistors detect keypresses. Each key has its own light source, but less photoresistors may be used: When keys are equipped with different colored lights, a single photoresistor can identify several distinct keys by their wavelengths. One well-know implementation of optical keyswitches is the DataHand ergonomic “keyboard”. It’s too bad that we couldn’t make it to Keycon to show off these bad boys.
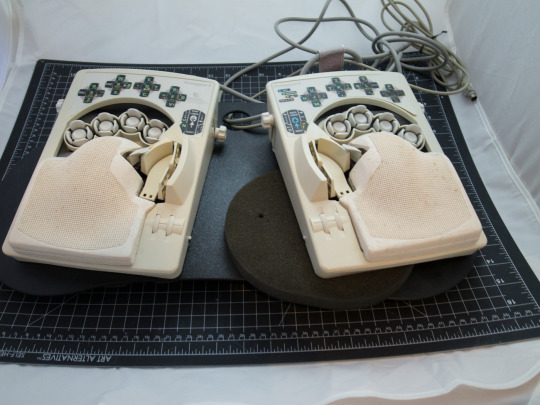
This simple sensing circuit has no corrosion, but being an optical system it is affected by dirt. N-key rollover is difficult to implement as you can’t simply add diodes.
Inductive
Long coils are traced onto a PCB, one for each key. Output voltages change based on the proximity of metals in the keyswitch. This approach offers the possibility of true analog sensing, and n-key rollover is possible without diodes. It’s also cheap, resistant to corrosion, and impervious to the environment. So why don’t we use it all the time?
For starters, its just plain complicated compared to say, an electrical contact switch. Like capacitive switches, analog to digital converters are required. Closely packed inductive switches create crosstalk. Crosstalk elimination is at odds with increasing the sensitivity – literally defined by the length of each inductor coil. And debouncing is still required.
Acoustic
And now for a switch you may never have heard of… (ahem): the acoustic keyswitch.
This extremely rare type of keyswitch actually presses a fake switch, similar to the Cherry MX Blue ‘jumping bean’ mechanism. [[jumping bean should link here to http://imgur.com/a/wuToY]] Underneath each row of keys is an isolated ‘transfer bar’, which the sliding ‘beans’ strike. On each end of the bar, a transducer (i.e. microphone or piezo) picks up the sound of the strike transmitted through the bar. The difference in arrival time between the two transducers tells which key was pressed.
The patent US 4376469 A expired in 2000, so if you want to make something like this, go nuts. It’s corrosion resistant, impervious to the environment, and yes – it will work underwater. On the other hand, its difficult to isolate the transfer bar, and N-key rollover would be very tricky, perhaps impossible.
The presentation slides are posted at Kiibohd.
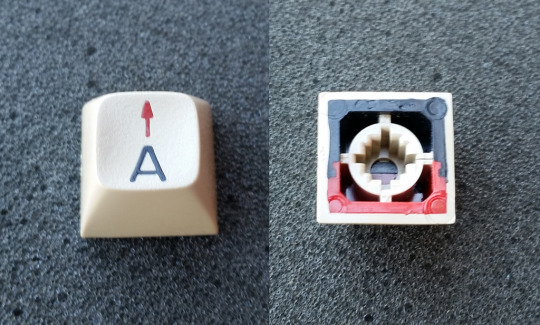
Hall effect switches in detail (Watch)
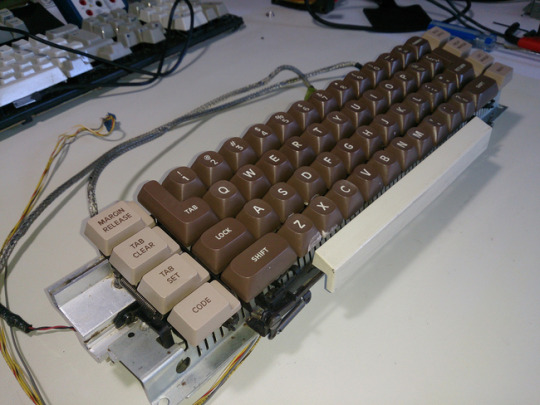
Sam (dorkvader) picked up where Jacob left off with an in-depth discussion of Honeywell Hall effect switches. (Tesla brand switches are functionally the same.)
Two kinds of Hall effect switches exist: dual magnet and single magnet. Dual magnet switches date back earlier than single magnet. In many Hall effect keyboards, larger keycaps are supported by two mechanical switches, only one of which has a sensor. These additional “dummy switches” functionally replace the stabilizers we commonly see on spacebars and other large keys, but do not necessarily imply a dual magnet. The keyboard is highly modular – switches could be replaced in the field and some keyboards even came with spares!
Hall effect sensors are extremely susceptible to strain, so sometimes multiple sensors in different orientations are summed together to reduce error. The key matrix can be scanned extremely quickly (100 mHz) – 3 orders of magnitude faster than Cherry MX electrical contact switches.
Debouncing a Hall effect sensor is a little different from other switches, since the outputs are analog. A threshold is established at which the key is considered ‘pressed’ or ‘released’, analogous to the actuation point of a Cherry MX linear switch. After this, the bouncing (which is purely the physical bounce of the key - not of any electric contacts) can be eliminated from the signal.
HaaTa had an idea to achieve N-key rollover with Hall effect sensors, which Sam plans to implement on his keyboard. Power is provided to each key in series across the rows of the keyboard, while outputs are in series down the columns. The circuit scans through each row sequentially, records the state of each key, then scans through each again to see if the state has changed.
Having finished his presentation, Sam passed around a keyboard for everyone to sign with a Sharpie as a souvenir of Keycon. He planned to mail it to a Geekhacker who couldn’t make it to the event. Aww.
// End day 1 presentations.
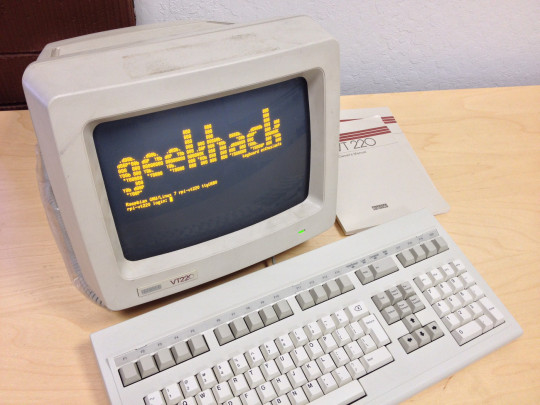
Geekhackers play text adventure games on a vintage VT220 terminal for the duration of the live stream.
Day 2 presentations
MC HKC Programmable Keyboard Controller (Watch)
HaaTa made another presentation on a very cheap alternative to the Teensy microcontroller called the MC HKC (pronounced McHack). It has a 50mHz clock speed, 128kb flash memory, and 48 pins – and costs only $5! If you need more pins, you can upgrade to a bigger board and use the same code. The source code and schematics are totally open, and you are encouraged to build your own.
The main disadvantage compared to the Teensy or Arduino boards is that you have to flash the bootloader yourself. This means you can ‘brick’ the device by flashing the wrong bootloader. If that doesn’t scare you off, check out the project on GitHub and get involved!
Designing Keyboard Layouts (Watch)
Vibex began his presentation with the assertion that “QWERTY is shit, and Dvorak is dumb too.“ This didn’t go over well with the audience of well, mostly QWERTY and Dvorak users, so Vibex clarified that Dvorak has too many same-finger digraphs and is too different from QWERTY. Colemak was spared his vitriol, probably because it is actually the best. (Full disclosure: I am typing this on the Colemak layout.)
The starting point for designing a keyboard layout is a character-frequency table for your language. Letters and characters which get used more – like ‘e’ and the spacebar in English – aught to be placed in the most comfortable positions, under the strongest fingers.
Second, you must consider the combinations of letters you are most likely to type. Digraphs (or strings of two characters) are analysed and a frequency table is produced. Some keyboard layout designs implement trigraph optimization as well, though this is less common. One goal of digraph analysis is to avoid same finger combinations on different rows, and especially ‘row jumping’ (same finger combos which jump the home row).
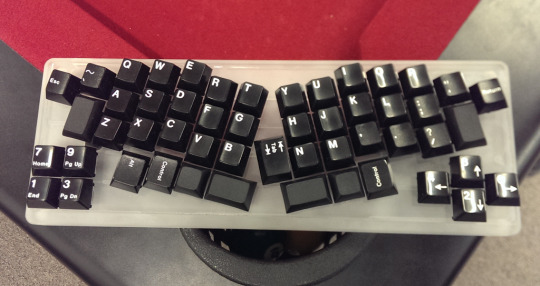
Vibex started designing his own keyboard layout when he got a ‘40%’ SmallFry keyboard, also known to Geekhackers as the JD40.
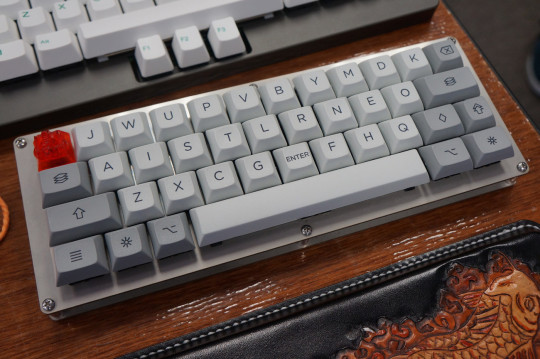
You’d notice right away that this keyboard is tiny, but perhaps not just how tiny. Notably, the 40% layout eliminates the rightmost 2 columns of keys. These are used exclusively for punctuation on QWERTY, but in Colemak (which Vibex was using previously) the right pinky produces the letter ‘o’ in home position. Since this key was absent on the 40% layout (and he didn’t want to assign ‘o’ to the double sized ‘Enter’ key which had replaced it), he decided to make his own layout.
He started with letter frequency optimizing the home row, moving punctuation to 2nd layer. Vibex didn’t do any computer aided layout design, but just used pen, paper, and trial and error to come up with the ‘JWUP’ layout you see above.
The layout exists in both hardware (programmed into the keyboard) and software (a Linux xmodmap file). Apparently, Vibex now types about 50 wpm on the layout, which ain’t bad!
Metals Processing for Keyboards (Watch)
Geekhack forum hero (and aerospace engineer) CPTBadAss knows metals. And it turns out metals are used in keyboards quite a lot. Metal enclosures are cast or milled, mounting plates are cut by laser or water jet, leaf springs are stamped and coil springs are wound on a purpose-built machine. Of course, there’s nothing stopping you from winding piano wire around a dowel to make your springs, or manually milling plates and enclosures from a metal block, but in order to achieve consistency and lower cost CNC machines are widely employed in manufacturing.
Why process metals?
The choice of metal, and the processes applied, depends on the application, and the desired material properties for that application. Is corrosion resistance most important? Hardness? Ease of welding? The choice of raw material plays a big part in achieving these goals. Aluminum, stainless steel, and titanium are alloyed to give specific material properties to each. Differences in refining and melting processes (like passing electric current through the crucible), heat treatments and mechanical treatments each alter the properties.
Processes in detail
Stamping, milling, waterjet, and laser are ways of cutting, with the latter two being the most common for keyboard parts. Waterjet cutting can introduce corrosion, but can cut thicker than with a laser. In either case, a cutting nozzle follows programmed vectors, like a plotter. The cutters are computer controlled through a printer driver.
CNC milling is akin to an automated Dremel. Actually, it’s the material that is moved, while the cutting bit is stationary. A manual mill is more like a drill press – but again it is the material that moves, not the bit.
Metal can be cast in a process similar to jello moulds. Casting can produce three-dimensional shapes more economically than milling, but tooling is expensive so this is only appropriate for large manufacturing runs. For two-dimensional shapes stamping is employed. Keeping with the kitchen analogy, this is like a cookie cutter. A very, very heavy cookie cutter.
A spring forming machine bends wire around something. It has many robotic ‘arms’ which manipulate the wire and can produce complex shapes. Keyboards only require simple, continuous coil springs which can be made extremely quickly.
Post treatments
Anodization increases the thickness of the oxidization layer, for corrosion resistance or aesthetic purposes. ‘Soft’ anodization refers to a layer less than .001” thick; ‘hard’ anodization refers to thicker layers.
Anodization works by sending electrical current through an acid bath. The current releases hydrogen and oxygen, which oxidizes metals in the bath. Afterwards, dye can be added into the porous oxide layer. Finally, a sealant is applied.
Shot peening involves shooting tiny steel balls, sand, or beads at the metal part. The main goal of this treatment is to add a compressive stress layer, but it also changes the surface finish. Media blasting uses crushed walnut shells sourced from agriculture industry waste, and is often used to change the surface shape.
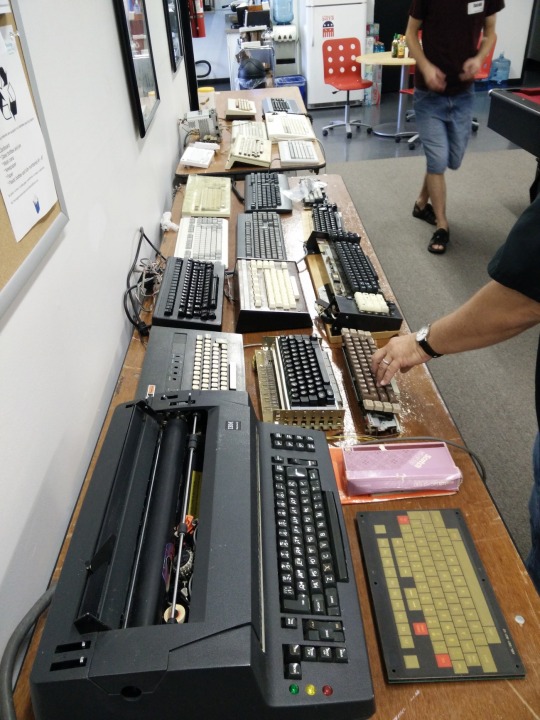
Keyboards on display
Besides the presentations, there was a ton of cool keyboards on display. Everyone brought the gems of their personal collections, and a few manufacturers showed up with new models. Cooler Master wouldn’t allow pictures of their latest Novatouch tenkeyless prototype.. but the more interesting elements of that board are under the keycaps anyway.
The keyboard collage shows the majority of keyboards that made it to Keycon, but I’m including a few of my favorites below at full-size. All photos used with permission and link back to their sources.
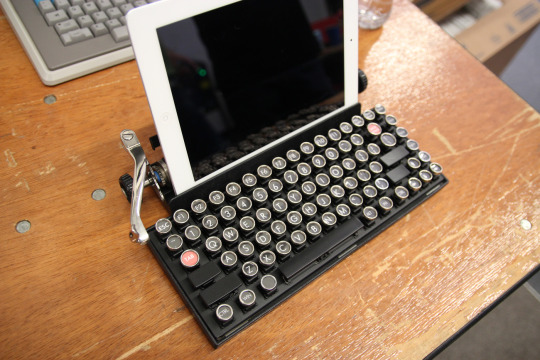
Qwerkywriter prototype
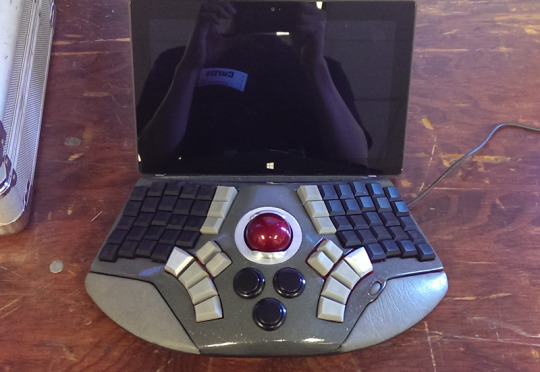
Kurplop’s amazing homemade ergo board
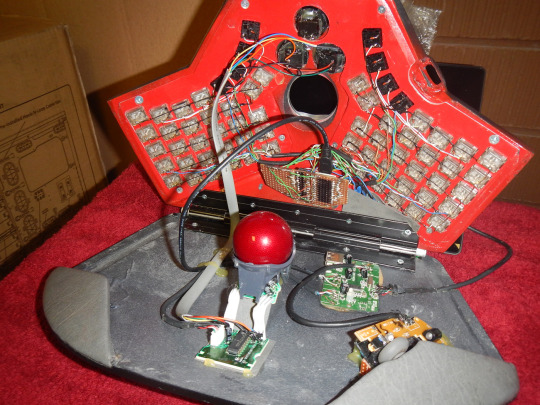
Popping the hood: Like most of our early prototypes, this curved beauty is hand-wired.
Putting the ‘board’ back in ergo board
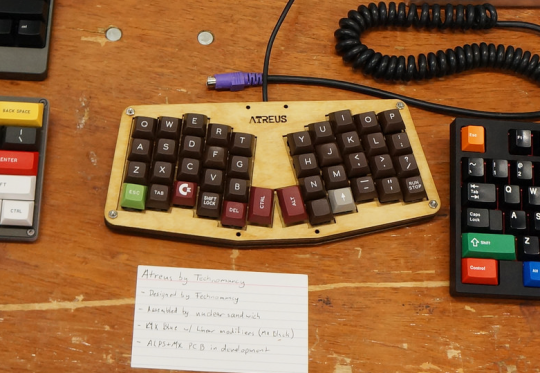
Atreus 40% ergo
Another minimalist ergo design
Just… why?
Somebody brought a whole crate of trackballs for this demonstration.
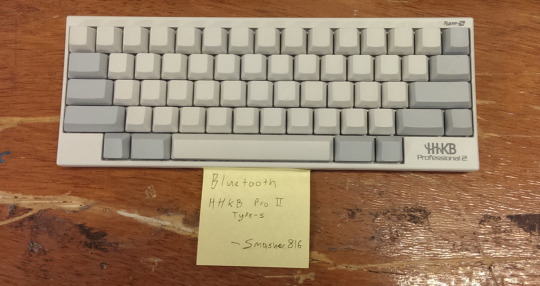
Smasher816 added Bluetooth to his HHKB Pro II Type S
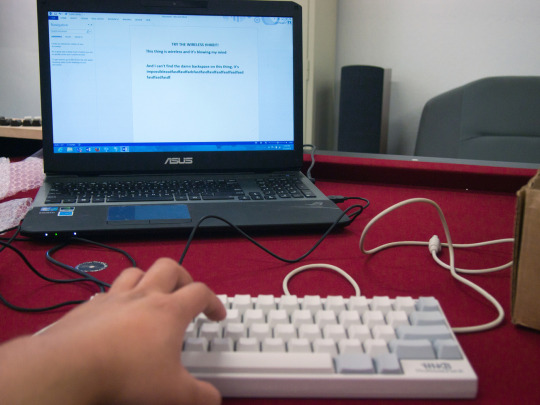
Bluetooth HHKB in action
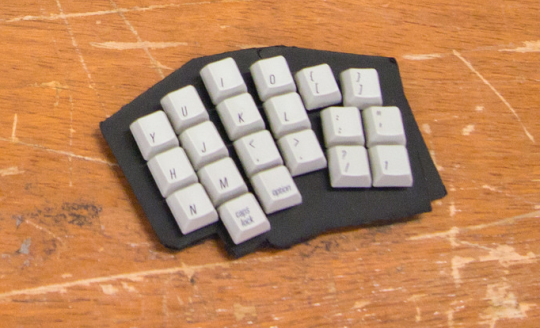
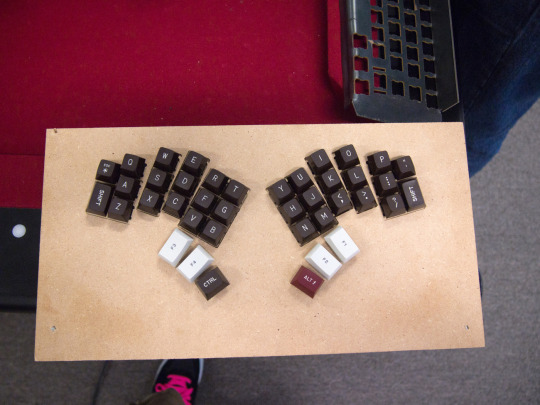
Right hand non-functional ergo prototype. Note the staggering of the top right keys, suggesting ring finger use.
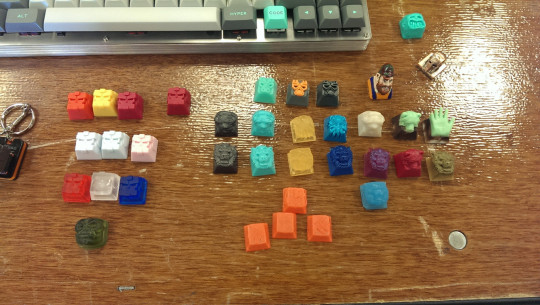
Novelty keycaps
Tripleshot keycaps!
// End Keycon 2014. Still wish I could have been there to meet everybody… and try all their keyboards. Next year!
– Mike