(This post originally appeared on Jesse’s blog in December, 2012.)
In early 2012, I ran across a fascinating project on the keyboard forums at geekhack.org. The ErgoDox is a project by some gifted hobbyists to build a split ergonomic keyboard inspired by the Key64 Project. The Key64, in turn, counts the µTron, TypeMatrix, Maltron and Kinesis keyboards among its influences. The right place to read up on the ErgoDox is probably this thread on deskthority.net, since ergodox.org is still fairly spartan.
As soon as I saw it, I signed up to buy an ErgoDox kit when the folks designing it were ready to start the group-buy process. Being somewhat mechanically disinclined (I’m a software guy), I said that I’d pay extra to have someone else solder it together for me. And then I waited. And waited. And waited. Don’t get me wrong – It’s a free, open-source project. My impatience is not a reason for someone else to work any faster. But I was excited.


Right away, I ordered roughly 80 Cherry “blue-stem” MX keyswitches and 1N4148 diodes from Digikey or Mouser. I don’t recall which. Both are great vendors. (Generally, I find that I prefer keyboards with brown-stem Cherry keyswitches, but I was curious about the clickier-sounding blues. They’re not bad, but from here on in, I’m back to brown-stem switches.)
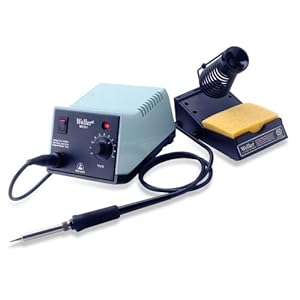
I went out and bought a Weiler WES51 soldering iron. (Disclosure: That’s an Amazon affiliate link. I earn money when you buy things through it.) At the same time, I picked up some solder, a pair of pliers, some de-soldering braid, a brass-wire sponge soldering iron cleaner and some helping hands.
I bought a pair of Teensy++ microcontrollers from PJRC. Initially, I opted for the ones with pins. I later regretted that. Still later, I unregretted it. The Teensy is a tiny little circuit board built around an 8bit Amtel AVR processor and a MiniUSB port. It has an Arduino compatibility mode, but I’ve only worked with it in its native personality. PJRC provides Mac, Linux and Windows versions of a tool to install new firmware onto the Teensy over USB. You just hit the “reset” button and the Teensy reboots into program mode.
Over the course of a week, everything showed up at my doorstep. I played a little bit with the soldering iron. I wired up four keyswitches to a breadboard, loaded the sample “USB Keyboard demo” firmware from PJRC’s website onto the teensy and made letters show up on the screen. Neat! I then put everything on the shelf and didn’t really touch it for months.
In September, I noticed that 3D designs for a prototype shell for the keyboard had shown up on ergodox.org. Designs for the PCBs were (intentionally) absent. For a variety of reasons, the project’s creators didn’t want to ship PCB designs before they were ready. Nonetheless, I downloaded the .stl files for the keyboard’s shell and made my way over to Shapeways. I uploaded the .stl files and a few minutes later, Shapeways told me that if I chose their standard laser-sintered white plastic, I was looking at a cost of about $230. This was…slightly pricier than I’d expected. Because I wasn’t actually sure that I was going to be able to do anything useful without those PCBs, I only ordered the top sides of the keyboards. I made a deal with myself: If I managed to wire up at least one side of the keyboard and get it to output characters, I’d buy the bottoms, too.
Still, the folks designing the ErgoDox (mostly Dox himself) hadn’t released their PCB designs, though they’d done an initial run of prototype boards to validate their design. But I was impatient.
Two weeks later, I got a package in the mail from Shapeways containing the top halves of an ErgoDox shell. They were…dusty. (The way Shapeways’ 3D printing tech of choice works is that they fire a laser mounted on a plotter into a big tub of plastic dust. It traces one (very, very thin) layer of your design in the plastic dust. Then platform holding the object being printed drops a tiny, tiny bit into the bin and the laser melts the next layer of dust onto your design.) I rinsed off the shells and started popping 70-odd keyswitches into 70-odd 4mm x 4mm holes. Then I put keycaps on top of the keyswitches. I had an incredibly high-quality non-working fake plastic keyboard!
It took another week or two, but I decided I wasn’t going to wait for the ErgoDox team. I set up a soldering station at my desk, pulled out the right-hand side of the keyboard. Inspired by lowpoly's Apple M0110 Today, I decided I’d try to wire the keyboard freehand. That sounds fairly hardcore. It’s not. (It’s nowhere near as hardcore as designing a PCB.)
It turns out that Keyboards are really, really simple. A keyboard is just a matrix of keys. You wire up the rows to one set of analog lines on a microcontroller. You wire up the columns to another set. If your rows are A,B,C,D and E, your columns will be 1,2,3,4,5 and so on. Typically, “Esc” is in the upper left-hand corner of your keyboard. That’d be the A1 position in your matrix. When you tap Esc, the keyswitch momentarily connects the “A” IO to the “1” IO. On some keyboards, you’ll find the “Tab” key. That’s connected to B and to 1. The “1” key would be connected to A and to 2. The astute reader might now ask “So, what if I hit 1 and "Tab” at the same time. Is that going to generate a spurious “Esc”? Or maybe a “Q”? Yep. Well, it will if you’ve wired up your matrix without diodes. That’s called “ghosting”. I remember making my Apple //e ghost when I’d finally learned to type fast enough that I was sometimes hitting keys at almost the same time. Rather than attempt to explain how diodes let you build a matrix that doesn’t ghost, I’ll refer you to someone who actually understands how this works.
I got out my pliers and my diodes and my keyswitches. It was at this point that I realized that I didn’t actually have any wire to wire my keyboard with. So, I did what any self-respecting geek would do. If it were 1985. I walked into a Radio Shack. Voluntarily. It turns out that behind the Beats By Dre®, displays full of Blackberries®, and low quality iPhone® accessories, they still sell some DIY supplies. I could have bought my diodes there. For only a few orders of magnitude more money than they’re worth. They even sell Arduino kits now. I picked up a spool of copper wire and was on my way back home within a few minutes.
Once at home, I made a few startling discoveries. 1) I did not own wire cutters. 2) The wire I’d bought was way, way too stiff to work with very easily. As I was getting settled, I started up the pilot of Community on Hulu. (I’d never seen it.) and started wiring the diodes in series across the rows of keyswitches. It took a while, but I got all the keys on the right-hand wired up. After that, I started cutting tiny little lengths of wire and stripping the ends with a pair of nail clippers. I wired up all the columns of keys with tiny little hops of green wire. And horrible, horrible drippy solder joints.
I stuck the Teensy into a breadboard and wired up a couple rows and columns to a few of its IO pins. I grabbed the best, most flexible USB Keyboard driver I could find for the Teensy – The firmware for the Humble Hacker Keyboard. It’s designed to support multiple “layers” of keys you can access by holding down modifiers. It’s fully programmable. It’s well commented. And it has a “matrix discovery” mode. You don’t need to actually know what pins you’ve wired things up to. You just connect your rows and columns to the Teensy’s various IO ports (The ports have letter+number identifiers like A1 and F6. Those aren’t the same as the examples I used in the keyboard matrix earlier. Then you hit a key and it will print things like (A1,E2). Then you know that that key’s row is connected to the A1 IO line and its column is connected to the E2 line.
At least, that’s how it’s supposed to work.
Once I got the Humble Hacker firmware installed on the Teensy, I was able to hit a key and have it register as a keypress. Sometimes. I started to triage what was going wrong. Many of my problems were just bad solder joints. As I repaired those, I started to notice that I was only able to generate keypress events for half the keyboard or so. I eventually figured out what I’d done wrong. I’d wired my diodes in series. They’re supposed to be wired in parallel. If I actually understood anything about electronics, this would have been blisteringly obvious.
I desoldered everything, using copper braid to try to suck up my waste solder.
Then I started again. I wired up the diodes in parallel – Each key connected to one side of a diode and the other side of each diode bridged to its neighbors in the row. Rather than using little wires to hop from key to key on the columns, I stripped longer lengths of wire and bent it so that I could solder one length of wire to each key in a column. This proved much less fiddly to solder and much, much more robust.
Now the matrix barely worked at all. I’d managed to misidentify which direction the diodes should be connected in.(Diodes are directional)
So I undid everything and started again. I ordered a bunch more diodes. They’re cheap and I was clearly not very good at this.
Eventually, I was able to get every single key on the right hand side to generate a keypress event. That was good enough for me to go ahead and order the bottom shells for the keyboard. I also ordered a bunch of very useful stuff from Adafruit. I bought some very nice tweezers, which made wiring up the diodes a lot easier. I bought proper wire strippers. I bought good pliers. I bought ribbon cable with breadboard-compatible pins on the end. And I bought a Solder Sucker. Best $5 I’ve spent in a long time. Rather than trying to sop up excess solder with copper braid, the Solder Sucker just…vacuums up the hot solder. I also bought a multimeter, which made finding wiring faults much easier. (I’d previously been using an LED soldered to a pair of wires and a battery. Not recommended.
I started in on the second half of the keyboard. The basic matrix wiring went much quicker. I still screwed it up and redid the entire matrix at least once. I was finally ready to wire the two halves of the keyboard together.
To be continued